Impressive is a program that displays PDF presentation slides with style. Smooth alpha-blended slide transitions are provided for the sake of eye candy, but in addition to this, Impressive offers some unique tools that are very useful for presentations. 在簡報播放時 Highlight 畫面
]]><p>蒐集個人覺得有幫助的文章及連結甚至是小範例。本次內容包含:PHP、Laravel、DevOps、GitLab、軟體工程等內容。</p>
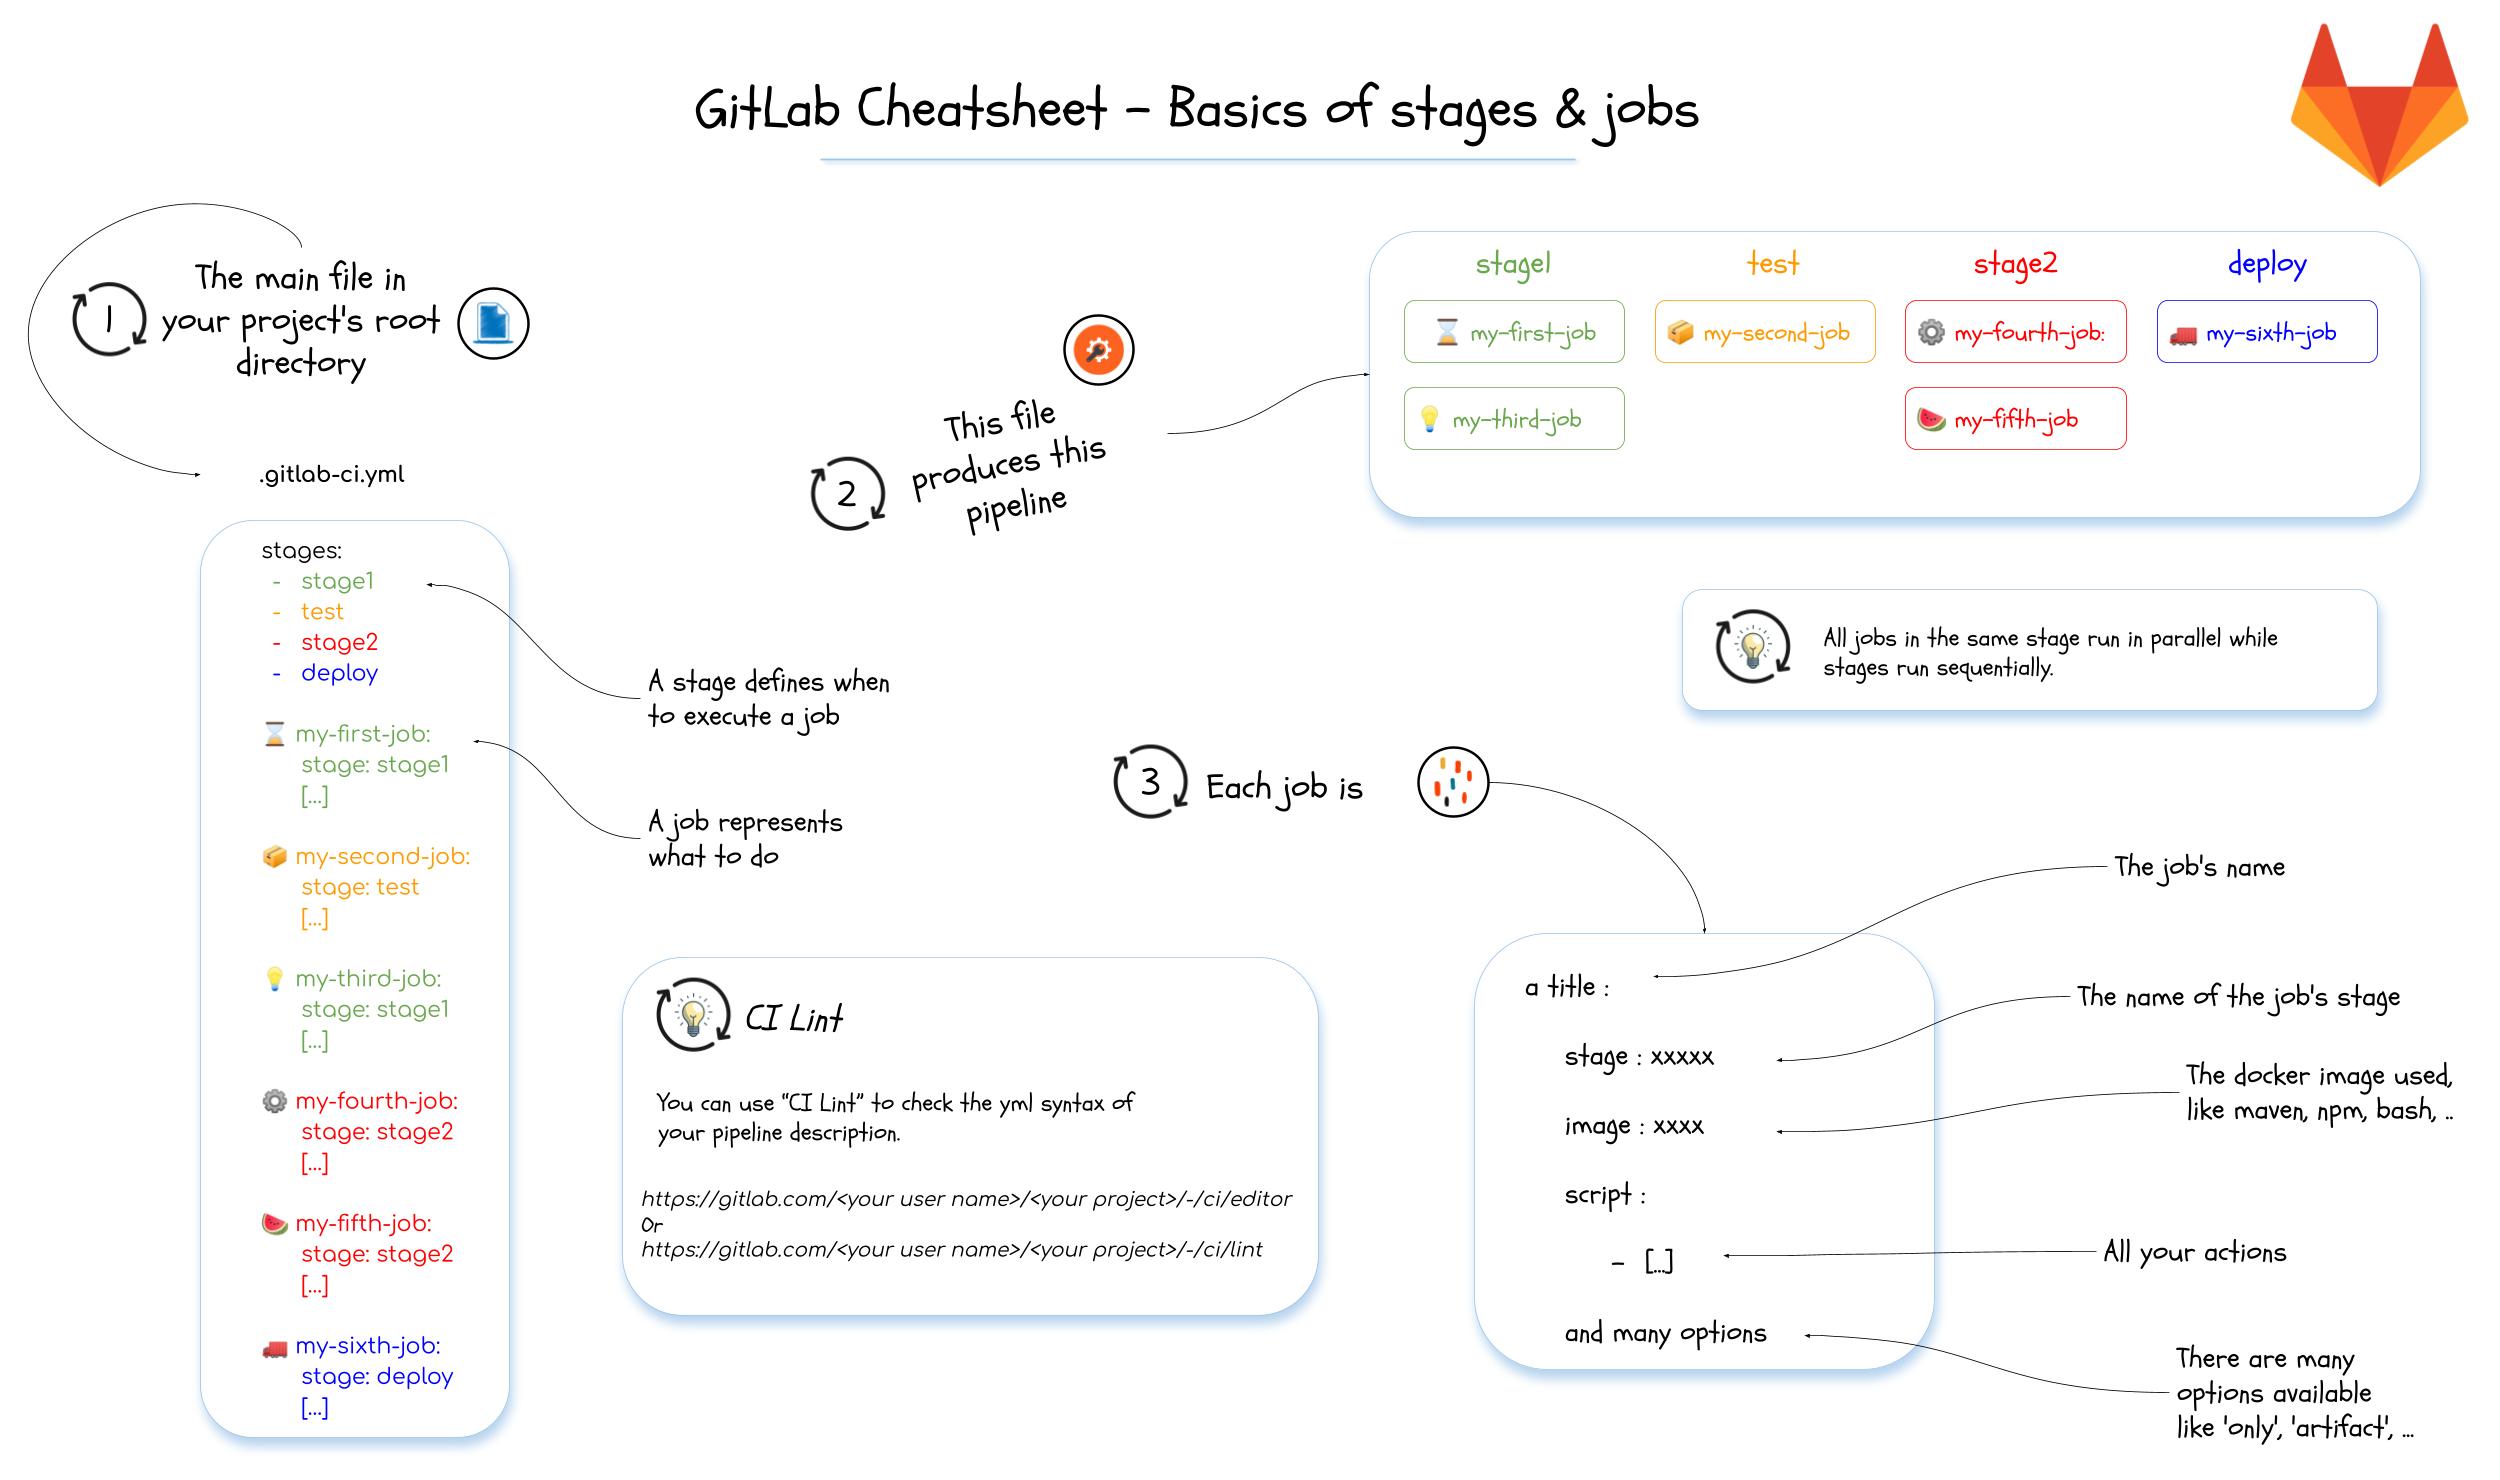
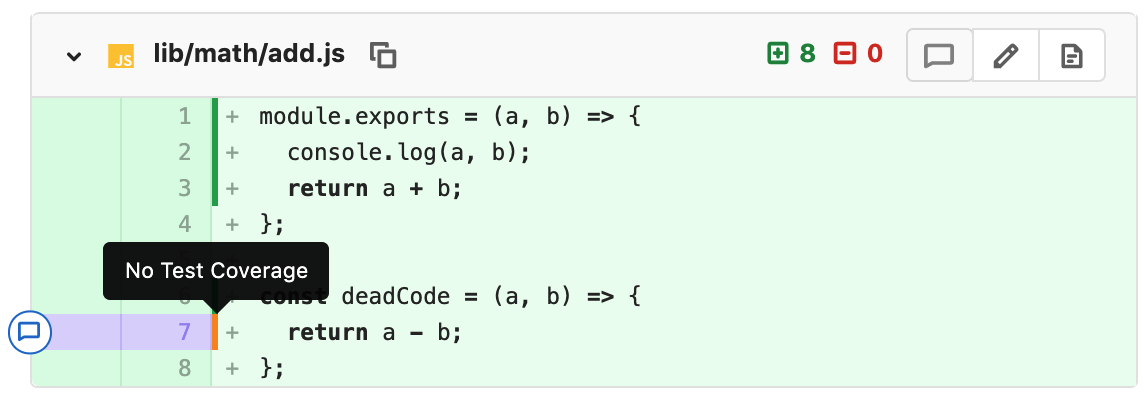
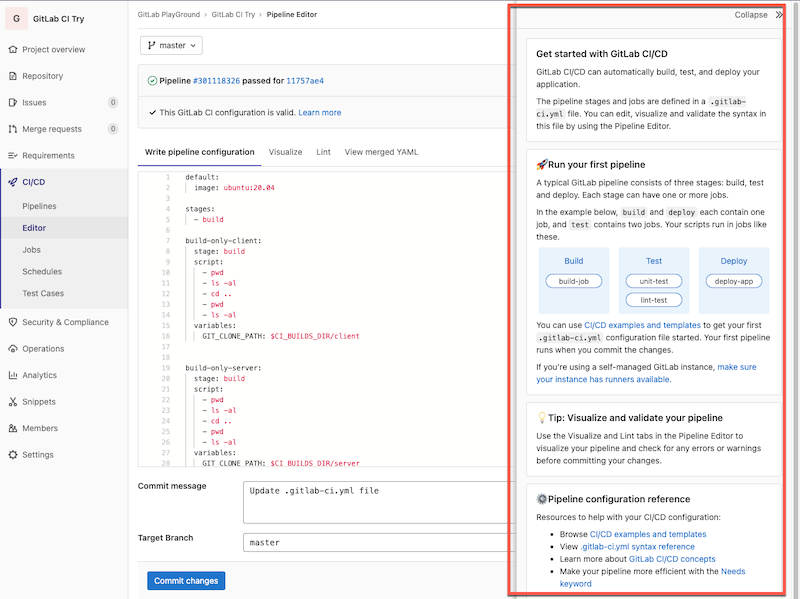
<p><img src="/Snippets/2021/2021-06-15-bookmarks/gitlab-ci-cd-notes.jpg" alt="GitLab CI CD Note" loading="lazy"><br>本次選圖取自:<a href="(https://twitter.com/ane_naiz/status/1396775879099944966?s=21)">GitLab CI CD Note</a></p>GitLab CI - 在 Merge Request(MR) 中檢視 PHP 測試代碼覆蓋 (Code Coverage) 情況https://mouson.im/Notes/GitLab/gitlab-show-php-code-coverage-in-merge-request/2021-06-14T09:17:29.000Z2022-07-01T09:17:29.000Z2022.06.30 Update
在 GitLab CI 提供的眾多報表功能中,artifacts:reports:junit 主要是用來搜集並呈現「單元測試」執行結果的報表,使用JUnit report format XML files,看到 JUnit 熟悉的朋友可能知道,這是 Java 語言在撰寫單元測試常用的工具。那麼,在 PHP 語言中,如果也要產出同樣的報表,應該要怎麼產生呢?
Warning: file_put_contents(/builds/mouson-gitlab-playground/feature-demo/gitlab-phpunit-gen-junit-report-demo/build/report.junit.xml): Failed to open stream: No such file or directory in /builds/mouson-gitlab-playground/feature-demo/gitlab-phpunit-gen-junit-report-demo/vendor/brianium/paratest/src/Logging/JUnit/Writer.php online 99
進而造成 GitLab 工作完成後,要打包產出物時,找不到檔案而產出另外一個警告。(如下)
1
2
3
Uploading artifacts... WARNING: build/report.junit.xml: no matching files ERROR: No files to upload
]]>Introduce tag plugins in freemind.演講紀錄 - 深入GitLabCI-談描述檔重構與流水線加速https://mouson.im/Publication/GitLab/20201128-slide-gitlab-ci-refactor-tuning/2020-11-28T14:42:45.000Z2021-05-09T14:42:45.000Z01 - 活動紀錄
活動:台中自由軟體愛好者社群
名稱:深入GitLabCI-談描述檔重構與流水線加速
內容介紹:本次的講題是在 「台中自由軟體愛好者社群」所做的分享,內容主要著重在 GitLab CI 在流水線加速與描述檔重構兩個部分。
# MySQL information: replace it with your own # 資料庫位置 hostname='localhost' # 資料庫使用帳號 username='user' # 帳號使用的密碼 password='password' # 資料庫名稱 database='daname'
三、實際操作
執行以下指令:
1
sh /root/WebSiteBackupTools/Scripts/Backup2Dropbox.sh config.sh
當你有多組網站需要備份,也可以這樣使用
1
2
sh /root/WebSiteBackupTools/Scripts/Backup2Dropbox.sh website1_config.sh
sh /root/WebSiteBackupTools/Scripts/Backup2Dropbox.sh website2_config.sh